To remove a dent from your car body, first identify the dent’s size and depth. For minor dents, try the plunger method or use a hair dryer with compressed air. For plastic areas, boiling water can soften the material, allowing you to push the dent out easily. If the damage is severe or shows exposed metal, it’s wise to seek professional help. Stick around to discover common mistakes to avoid and tips for maintaining your car’s finish.
Key Takeaways
- Assess the dent’s size and depth to determine if a DIY method is suitable or if professional help is needed.
- Use the plunger method for shallow dents by creating a strong seal and applying quick pulls.
- Employ boiling water to soften plastic bumpers, making it easier to push dents out from behind.
- Try the hair dryer and compressed air technique: heat the dented area, then cool it rapidly for effective removal.
- Always clean the area before touch-up painting to ensure proper adhesion and a durable finish.
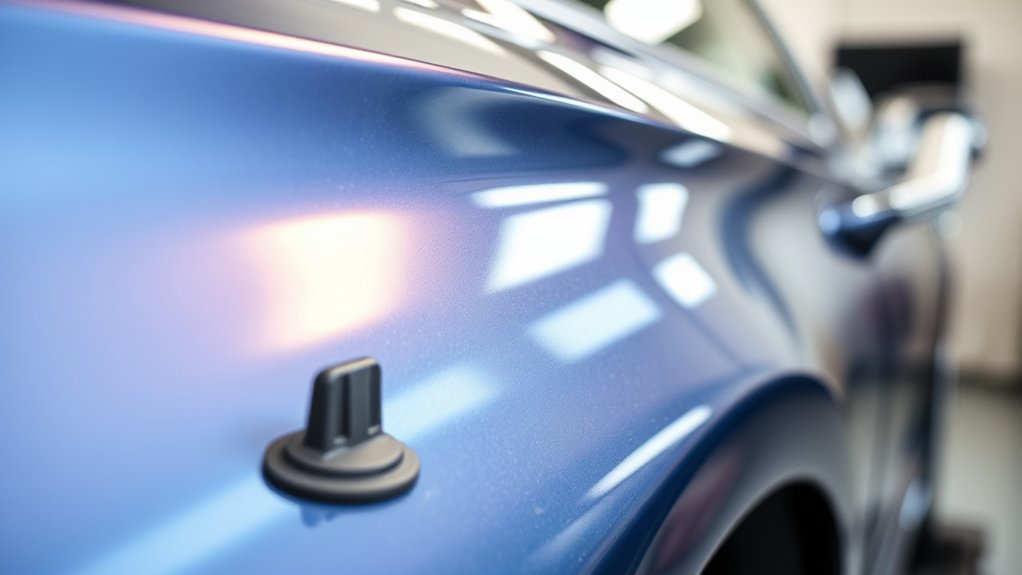
How to Identify Different Types of Dents?
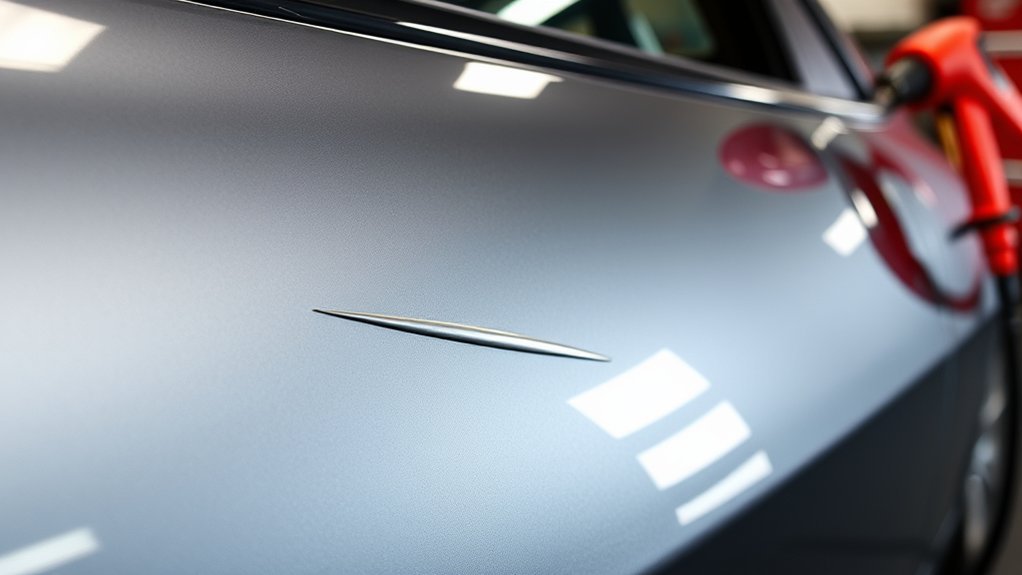
How can you tell what type of dent you’ve got on your car? Start by examining its characteristics: size, depth, and location.
Minor dents, often small and shallow, are usually straightforward to repair. You can tackle these with simple DIY methods like the plunger or boiling water techniques, making dent removal a liberating experience.
Next, assess medium-depth dents. These may require specialized tools, such as body hammers and dollies, to reshape the metal effectively.
If the dent is severe, exposing underlying metal or plastic, it’s best to seek professional help. Addressing these types promptly prevents further damage, like rust.
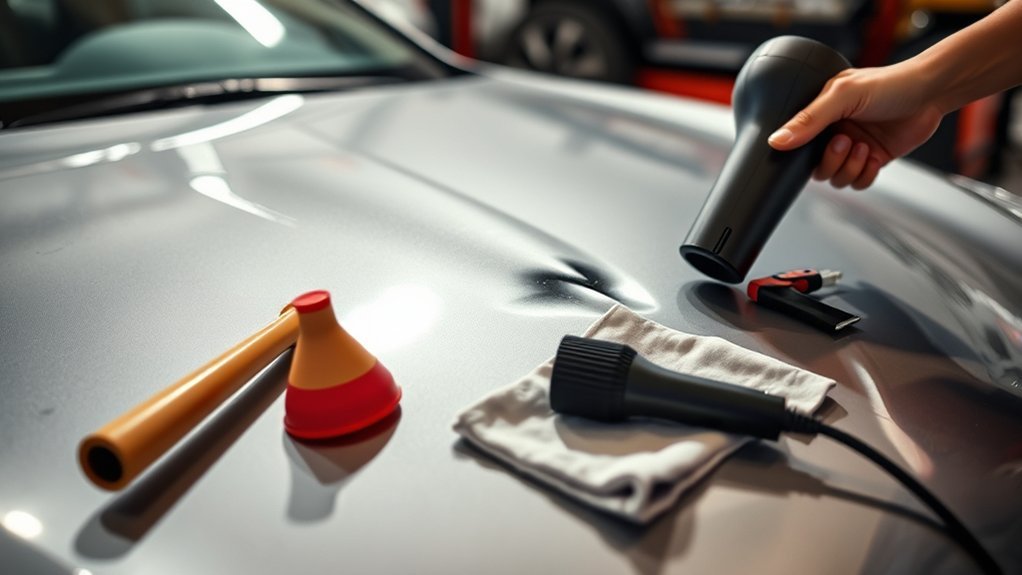
Essential Tools for DIY Dent Removal
When tackling dent removal, having the right tools at your disposal is essential for achieving effective results.
Start with body hammers and dollies; these tools work together to reshape the dented area by applying controlled force from both sides of the metal.
Utilize body hammers and dollies to effectively reshape dents by applying controlled force from both sides of the metal.
For plastic bumpers, pouring a pot of boiling water over the dent softens the material, allowing you to push it out from behind.
You can also use a hair dryer to heat the dent area, then spray compressed air upside down. The rapid temperature change may pop the dent back into shape.
Additionally, a vacuum cleaner can be employed with a bucket to create suction on shallow dents, offering an innovative method for repair.
Using the Plunger Method for Minor Dents
To successfully use the plunger method, you need to prepare both the plunger and the dented area properly.
Wetting both surfaces guarantees a strong seal, which is essential for effective pulling techniques.
Once everything is ready, you can apply the right amount of pressure and quickly pull back to help pop out the dent.
Preparing the Plunger Properly
Selecting the right plunger is essential for effectively removing a minor dent from your car’s body.
Begin with a clean household plunger or a suction cup specifically suited for dent removal. To enhance suction, moisten the rubber suction cup and the area around the dent.
Position the plunger directly over the center of the dent, ensuring it covers the entire dent area for ideal suction. Firmly press down, then pull back quickly with a steady motion, maintaining a tight seal until the dent pops out.
If the dent doesn’t fully release, reposition the plunger and repeat the process. This method can empower you to reclaim your car’s appearance with minimal effort.
Effective Pulling Techniques
Effective pulling techniques are essential for successfully removing minor dents using the plunger method. Start by moistening both the plunger and the dented area, which enhances suction.
Position the plunger firmly over the dent’s center. With a quick, steady pull back, you’re aiming to pop the dent out. If it doesn’t come free on the first attempt, reposition the plunger and try again.
This DIY method works best on smooth surfaces and isn’t suitable for deep or complex dents, as they require more pulling power. Remember, it’s all about mastering the pull and push technique to restore your car’s bodywork efficiently.
This quick solution requires no specialized tools, empowering you to handle basic repairs at home.
Boiling Water: A Simple Technique for Plastic Dents
Sometimes, minor dents in plastic bumpers can be frustrating, but boiling water offers a straightforward way to fix them.
To start, boil a pot of water until it reaches a high temperature. Carefully pour the boiling water directly over the dented area, allowing the heat to soften the plastic. Wait a few minutes for the plastic to become pliable.
Boil water, pour it over the dent, and wait for the plastic to soften and become pliable.
Next, reach behind the bumper and gently push the dent out from behind. This technique is effective for reshaping plastic dents without damaging the material.
Once you’ve popped the dent back into place, rinse the area with cold water to help set the plastic in its new shape. This method is ideal for minor dents and serves as a quick, cost-effective DIY solution.
With a little patience and the right approach, you can restore your bumper’s appearance with ease and confidence.
How to Use Hair Dryer and Compressed Air for Dent Repair
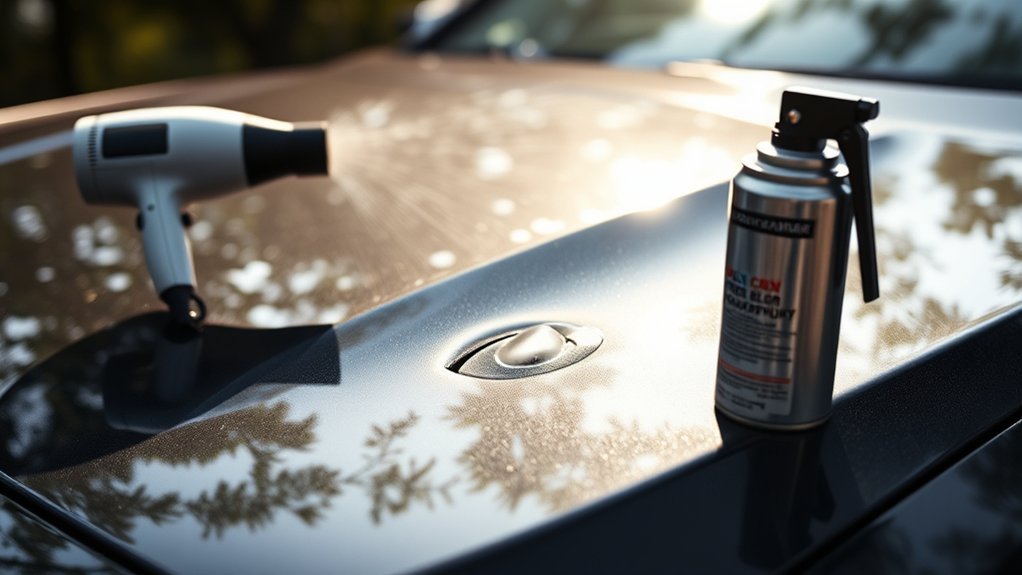
To effectively use a hair dryer and compressed air for dent repair, you’ll need a few specific tools and materials.
Follow this step-by-step process to guarantee you achieve the best results, and remember to keep some helpful tips in mind throughout.
This method works best on small metal dents, so let’s get started.
Required Tools And Materials
For this dent repair method, you’ll need a hair dryer set to high heat and a can of compressed air.
Position the hair dryer about six inches away from the dented area and warm it for several minutes, ensuring it’s hot but not too hot to touch. This even heating prepares the metal for the next step.
Once heated, quickly turn the compressed air can upside down and spray the warm metal. This action releases cold gas, causing a rapid temperature change that can make the metal contract and potentially pop the dent out.
After the repair, wipe away any moisture or residue from the compressed air to enhance the surface’s appearance.
Step-By-Step Process
While preparing to remove a dent from your car’s body, follow this step-by-step process to guarantee effective results using a hair dryer and compressed air.
First, set your hair dryer to the highest setting and heat the dented area for about 30 seconds to one minute, ensuring it’s warm but not too hot to touch. Hold the dryer a few inches away, moving it around for even heat distribution.
Once heated, quickly spray the dent with a can of compressed air held upside down; this cold spray causes the metal to contract. The rapid temperature change may pop the dent back into shape.
Afterward, wipe away any moisture and repeat if necessary for deeper dents, achieving effective paintless dent repair (PDR).
Tips For Best Results
Although using a hair dryer and compressed air can effectively remove dents, following specific tips enhances your chances of success.
For ideal paintless dent repair (PDR) on smaller dents, consider these guidelines:
- Use the hair dryer on the highest setting, holding it about 6 inches away to avoid overheating.
- Heat the dented area for several minutes until warm but not too hot to touch.
- Quickly spray the heated metal with compressed air held upside down to create a rapid temperature change.
- If the dent doesn’t pop out fully, repeat the heating and cooling process for better results.
Utilizing Dry Ice for Dent Repair
If you’re looking for an effective way to remove a dent from your car, utilizing dry ice can be a practical solution.
To start, put a piece of dry ice directly on the center of the dent for 15-30 seconds. This rapid temperature change can cause the metal to contract and potentially pop the dent back into shape.
Remember to wear gloves when handling dry ice, as its temperature is extremely low and can cause frostbite.
After applying the dry ice, gently press around the edges of the dent to encourage the metal to return to its original form.
Be cautious not to leave the dry ice in one spot for too long, as it could damage the paint.
This method works best on small to medium-sized dents in metal panels, allowing you to restore your vehicle without extensive repairs.
When to Consider Professional Dent Repair Services?
When dealing with a dent in your car, knowing when to seek professional repair services can save you time and prevent further damage. Here are some key situations to reflect on:
- If the dent is large, deep, or on a structural area, professional dent repair services are crucial for safe restoration.
- Dents that expose metal or damage the paint should be addressed immediately to avoid rust.
- If your attempts at paintless dent repair (PDR) or suction methods fail, it’s time to call in the experts.
- Complex dents needing specialized tools, like heat guns or suction devices, are best left to trained technicians.
Opting for professional services not only guarantees a quality finish but also helps maintain your vehicle’s value by addressing cosmetic issues and preventing future problems.
Choosing professional repair services ensures a high-quality finish and preserves your vehicle’s value by tackling cosmetic concerns and avoiding future issues.
Don’t hesitate to reach out for the expertise you need.
Top 5 Mistakes to Avoid in DIY Dent Removal
Attempting DIY dent removal can be tempting, especially after weighing the costs of professional services. However, avoiding common mistakes is essential for effective results.
First, always assess the dent’s depth and curvature before choosing your tools; improper selection can lead to further damage.
Second, don’t use excessive force when hammering; modern cars often feature thinner sheet metal that can easily stretch and worsen the dent.
Third, create proper access points by removing door panels or fenders, ensuring effective hammering and complete dent removal.
Fourth, be cautious with heat application; overheating the metal with a hairdryer can damage the paint, so apply heat evenly.
Finally, don’t skip cleaning the area of wax and grease before touch-up painting, as debris can compromise the finish’s appearance and durability.
How to Maintain Your Car’s Finish After Dent Repair
After you’ve repaired a dent, maintaining your car’s finish is vital for long-lasting results.
Regularly wash your vehicle with gentle automotive soap to keep the surface clean and free from contaminants.
Additionally, applying a high-quality wax every few months will provide essential protection against environmental damage.
Regular Washing Routine
To keep your car’s finish in ideal condition following a dent repair, establishing a regular washing routine is essential. Washing your car not only helps clean the area but also removes dirt and debris that can scratch or dull the finish.
Aim to wash your vehicle every two weeks using a pH-balanced car wash soap. Here are some key tips:
- Use a microfiber towel to dry your car, preventing water spots.
- Avoid harsh detergents that could damage the paint and clear coat.
- Consider a clay bar treatment every six months to eliminate embedded contaminants.
- Apply a quality wax or sealant every three months for added protection.
Protective Wax Application
Maintaining your car’s finish post-dent repair requires more than just regular washing; applying protective wax is a key step in safeguarding the newly repaired area.
Protective wax application seals the car’s paint, creating a barrier against environmental contaminants and harmful UV rays. To keep your vehicle looking its best, wax it every three months. This not only enhances shine but also prevents oxidation and fading.
Additionally, waxing fills in minor imperfections and scratches, ensuring a smoother surface. Choose a high-quality wax compatible with your car’s paint type for ideal protection.
Before application, clean the surface with a wax and grease remover; this is essential for effective adhesion and preventing dirt from being trapped under the wax.
Avoiding Harsh Chemicals
When caring for your car’s finish post-dent repair, steering clear of harsh chemicals is essential for preserving the integrity of your paint.
Chemicals like ammonia or bleach can strip protective wax and cause damage. Instead, consider these tips for maintenance:
- Use pH-balanced car wash soaps for cleaning.
- Apply high-quality car wax regularly to protect against UV rays and contaminants.
- Clean with microfiber cloths to avoid scratching the paint.
- Allow at least 30 days for the paint to cure before applying any sealants or waxes.
Tips for Preventing Future Dents and Damage
While you can’t control every potential hazard your car faces, there are effective strategies to minimize the risk of dents and damage.
Start by parking in designated areas away from high-traffic zones; this reduces the chances of accidental bumps from other vehicles.
Consider utilizing protective car covers or carports to shield your vehicle from hail and falling debris.
Installing door edge guards can further prevent dings from adjacent car doors in parking lots.
Be mindful of where you store tools and equipment, especially in garages or driveways, to avoid accidental impacts that could lead to dents.
Finally, regularly washing and waxing your vehicle not only maintains its aesthetic appeal but helps preserve the paint integrity, making it less prone to damage from minor impacts.
Frequently Asked Questions
What Is the Easiest Way to Remove a Dent From a Car?
The easiest way to remove a dent from your car is using DIY methods, like the plunger technique or boiling water for plastic bumpers. For complex dents, consider professional services to guarantee the best results.
What Dents Cannot Be Removed?
Not all dents can be removed. Severe dents, those stretching metal beyond its limits, or located in double-layered areas, come with significant repair limitations. Additionally, damaged paint complicates the process, often requiring professional assistance.
What Is the Best Body Filler for Deep Dents?
For deep dents, you’ll want to use epoxy putty for dent repair. It offers strong adhesion and durability, ensuring a smooth finish. Just follow the manufacturer’s instructions for ideal results and effective application.
Does Boiling Water Pop Out Dents?
Yes, boiling water can effectively assist in dent removal. When applied, it softens the metal, allowing you to manipulate the dent back into shape easily. Just remember to rinse with cold water afterward to set it.
Conclusion
To wrap it up, successfully removing a dent from your car body isn’t rocket science; it’s more like a walk in the park—if you know what you’re doing! By utilizing the right tools and techniques, you can restore your vehicle’s appearance and save money in the process. Just remember to avoid common pitfalls and maintain your car’s finish afterward. With these tips, you can keep your car looking pristine and prevent future dents from cramping your style.


Leave a Reply