To remove deep scratches and scuffs from your car at home, gather essential tools like isopropyl alcohol, sandpaper in various grits, and a matching automotive paint pen. Start by cleaning the area with soapy water, then use alcohol to remove any oils. Sand the scratch carefully, apply thin layers of paint, and blend with progressively finer sandpaper. Finally, polish for a seamless finish. There’s more to perfecting your repair technique, so keep going!
Key Takeaways
- Start by cleaning the scratched area with soapy water and isopropyl alcohol to remove dirt and oils.
- Use 400 grit sandpaper to eliminate rust and feather edges of the scratch for a seamless blend.
- Apply matching automotive touch-up paint in thin layers, allowing each layer to dry for five minutes.
- Sand the repaired area progressively from 2000 to 5000 grit for a smooth finish and seamless integration.
- Polish the area with a soft cloth and avoid wax for 30 days to ensure proper curing of the paint.
Gather the Essential Tools for Scratch Repair
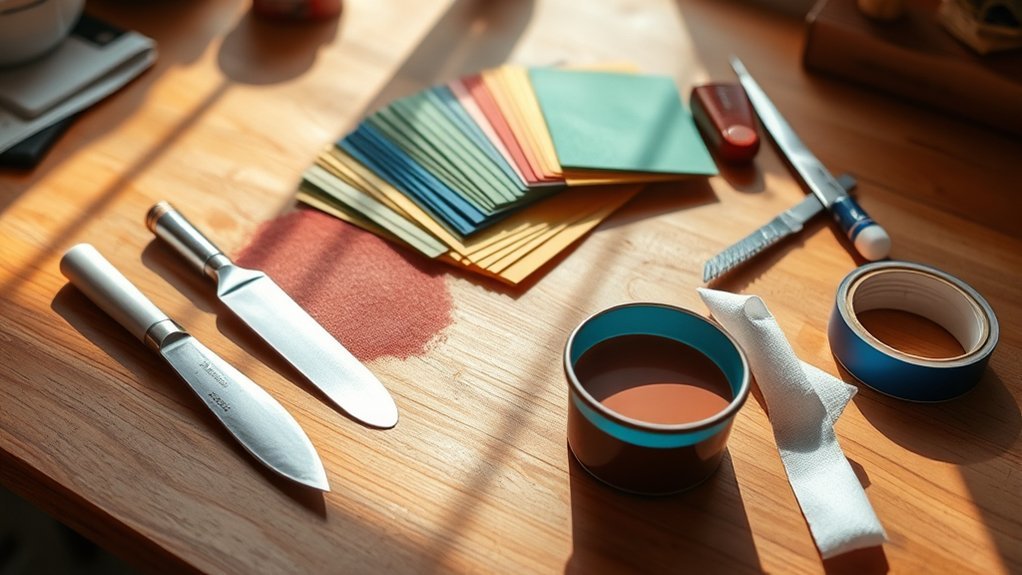
When it comes to repairing scratches on your vehicle, having the right tools is vital for achieving a professional finish. First, gather the necessary tools: isopropyl alcohol (70% or greater), soapy water, microfiber towels, and a razor blade for cleaning.
Repairing scratches on your vehicle requires essential tools for a professional finish, including isopropyl alcohol and microfiber towels.
It’s important to understand that smoothening the scratch requires sandpaper in various grits—400, 2000, 3000, and 5000—to blend the touch-up paint seamlessly with your car’s original finish. An automotive paint pen that matches your vehicle’s color is essential; make sure it includes both base coat and clear coat for best results.
Don’t forget tape to mask off the area surrounding the scratch, preventing paint overspray. Finally, prepare a polishing pad and polish for the last step, restoring the gloss after applying the clear coat and wet sanding.
With these tools in hand, you’re ready to tackle those scratches confidently!
Clean and Prepare Scratches for Repair
After gathering your tools, it’s time to clean and prepare the scratches for repair. Start with simple steps: clean the entire panel using soapy water, followed by isopropyl alcohol (70% or greater) to remove dirt and oils. Next, inspect the scratch for rust. If you find any, use 400 grit sandpaper to eliminate it and guarantee a smooth shift for paint adhesion.
Lightly sand the scratch area, feathering the edges for a seamless blend. Use a razor blade to tape off the scratch, preventing overspray and containing your repair area. Finally, confirm you have the correct automotive paint pen that matches your car’s color code, which is typically found on the driver’s door jam sticker or via the VIN.
| Task | Tools Needed |
|---|---|
| Clean with soapy water | Soapy water, sponge |
| Remove rust | 400 grit sandpaper |
| Tape off the scratch | Razor blade, tape |
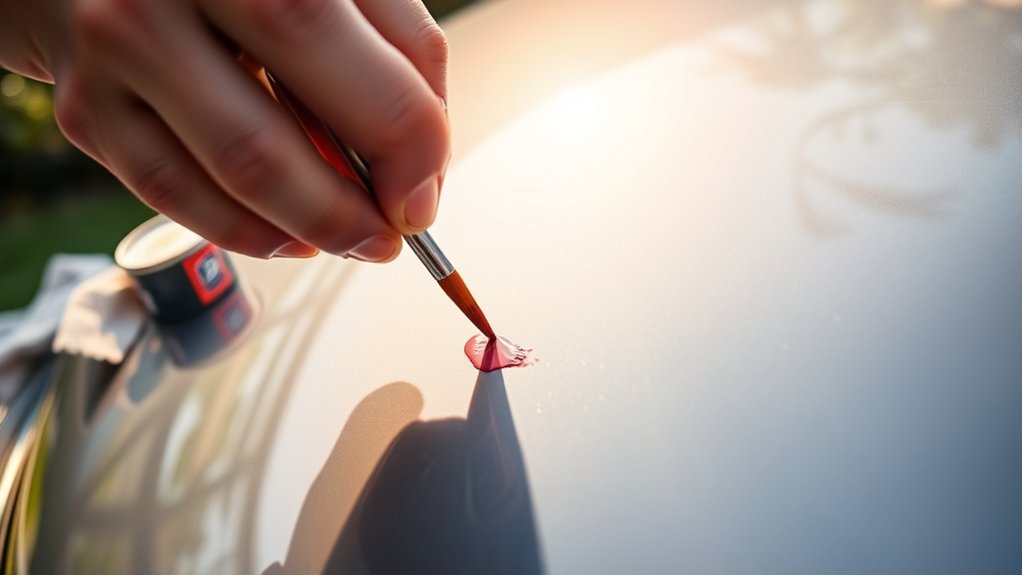
Apply Touch-Up Paint Like a Pro
To achieve a professional-looking touch-up, start by guaranteeing you have an automotive paint pen that perfectly matches your car’s color. This pen should include both a base coat and clear coat for the best results.
Before you apply touch-up paint, clean the area with isopropyl alcohol and soapy water to eliminate contaminants that could hinder adhesion.
To ensure proper adhesion, thoroughly clean the area with isopropyl alcohol and soapy water before applying touch-up paint.
When you’re ready, apply the touch-up paint in thin layers, allowing each to dry for about five minutes. This gradual build-up will help you reach the desired thickness without drips.
Once the paint has dried, you can carefully sand the area with progressively finer grits of sandpaper, starting from 2000 up to 5000, to seamlessly blend the new paint with the original finish.
Remember to wait about 10 minutes before removing any tape at a 45-degree angle to minimize visible paint lines. Avoid sealing with wax or ceramic coating for 30 days to guarantee proper curing.
Blend and Polish for a Flawless Scratch Repair

Once the touch-up paint has dried, blending and polishing the repair is essential for achieving a seamless finish.
Start by wet sanding the area with 2000 grit sandpaper to blend the new paint with the original surface. Gradually move to 3000 and then 5000 grit sandpaper, guaranteeing smooth changes and minimizing visibility. This progressive wet sanding helps restore the gloss of the surrounding paintwork.
After about 10 minutes, carefully remove the tape at a 45-degree angle to avoid disturbing the edges. Once blended, proceed to polish the area using a soft buffing pad or cloth. This final step enhances the shine and guarantees the repaired section seamlessly integrates with the rest of your vehicle.
Care for Your Car’s Finish After Scratch Repair
While caring for your car’s finish after a scratch repair might seem challenging, it’s essential for maintaining the integrity and appearance of the repair.
First, avoid applying wax or ceramic coating for up to 30 days; this allows the touch-up paint to cure fully. Use a simple soap solution to wash the repaired area regularly, preventing dirt build-up that could compromise the repair.
Keep an eye on the touch-up area for any signs of wear or fading and reapply touch-up paint as necessary to keep the finish looking fresh.
When drying, always use a soft, microfiber towel to avoid further scratching. For added durability, consider applying a clear coat after the repair, ensuring it dries thoroughly before sanding and polishing.
Frequently Asked Questions
How to Get Rid of Deep Scratches in Paint?
To get rid of deep scratches in paint, you’ll want to use scratch removal techniques like sanding and applying touch-up paint. Paint restoration methods, including blending and curing, will guarantee a seamless finish.
How Deep of a Scratch Can Paint Correction Fix?
You’d think a scratch could be fixed with magic—sorry, it’s not Hogwarts. Paint correction can handle scratches up to 0.5 mm deep; beyond that, you’ll need professional help for effective paint restoration.
How to Remove Deep Scratches From Car Yourself at Home?
To remove deep scratches from your car yourself, clean the area, sand it smooth, apply automotive touch-up paint in layers, then blend with fine sandpaper. These scratch repair DIY techniques will restore your vehicle’s finish.
Does WD-40 Really Remove Scratches?
WD-40 doesn’t effectively remove deep scratches; it might temporarily mask them but won’t repair the damage. For lasting results, consider automotive paint pens or professional repairs instead. Trust expert advice for proper scratch removal.
Conclusion
Now that you’ve tackled those deep scratches and scuffs, take a moment to admire your handiwork. Picture your car’s finish gleaming under the sunlight, a smooth canvas free of imperfections. By gathering the right tools and following these steps, you’ve not only restored the beauty of your vehicle but also saved time and money. Remember, regular care keeps your car looking brand new, so keep that shine alive and enjoy the road ahead!


Leave a Reply