Cloudy car headlights result from oxidation, reducing light output and visibility. To clean them, gather baking soda, white vinegar, non-gel toothpaste, microfiber cloths, and masking tape. Start by cleaning the headlights, then apply a paste made from baking soda and vinegar or toothpaste, scrubbing in circular motions. For severe cloudiness, use fine sandpaper for wet sanding, and finish with a UV sealant to prevent future clouding. Learn more about essential tips and common mistakes to avoid during restoration.
Key Takeaways
- Clean headlights with soap and water to remove dirt before applying any restoration method.
- Create a paste using 2 tablespoons of baking soda and 1 tablespoon of white vinegar for effective cleaning.
- Use non-gel whitening toothpaste on a damp cloth, scrubbing in circular motions for 5-10 minutes to restore clarity.
- Apply fine sandpaper (800, 1000, 2000 grit) for wet sanding if the cloudiness persists after initial cleaning.
- Protect restored headlights with a UV sealant or clear coat to prevent future oxidation and maintain clarity.
Why Are My Headlights Cloudy?
If you’ve noticed your headlights looking cloudy, it’s likely due to oxidation caused by prolonged exposure to UV rays. The polycarbonate lens material degrades over time, leading to a dull, hazy appearance.
Environmental factors, such as road debris and harsh weather, can exacerbate this issue, introducing scratches that further promote oxidation. This cloudiness can reduce light output by up to 80%, severely impairing your visibility during nighttime driving and increasing the risk of accidents.
Environmental factors like road debris and harsh weather can worsen headlight cloudiness, reducing light output by up to 80% and increasing accident risk.
Additionally, moisture trapped inside the headlight assembly may indicate leaks or damage, compromising performance. Addressing these problems through headlight restoration is essential not only for aesthetics but also for safety.
Regular maintenance and cleaning can combat cloudiness, while applying protective coatings can shield your headlights from UV damage and environmental contaminants. By taking these steps, you can restore clarity and guarantee peak visibility on the road ahead.
Essential Materials for Headlight Restoration
To effectively restore your headlights, you’ll need common household products like baking soda, white vinegar, and non-gel toothpaste with whitening properties.
Additionally, consider using a recommended restoration kit for thorough results.
These materials will help you achieve clarity and enhance your vehicle’s appearance.
Common Household Products
Restoring cloudy car headlights doesn’t require expensive products; common household items can do the trick.
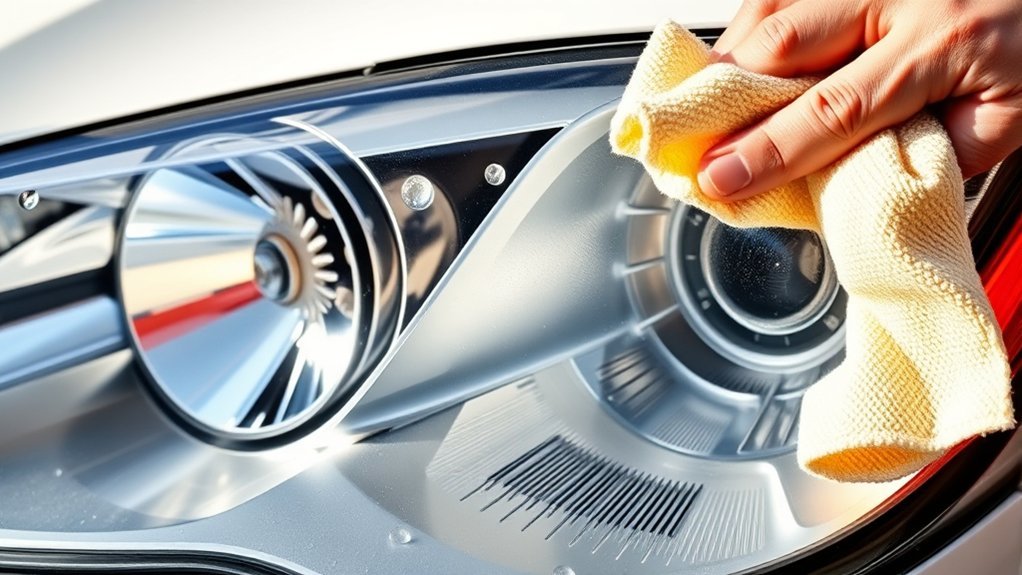
Start by cleaning the headlight lens with soap and water to eliminate dirt and debris. For effective oxidation removal, mix baking soda and white vinegar to create a paste. Apply this paste to the headlight lens using a microfiber cloth, scrubbing gently until the cloudiness diminishes.
Alternatively, non-gel whitening toothpaste can polish the headlights; apply it to a damp cloth and scrub in circular motions for 5-10 minutes.
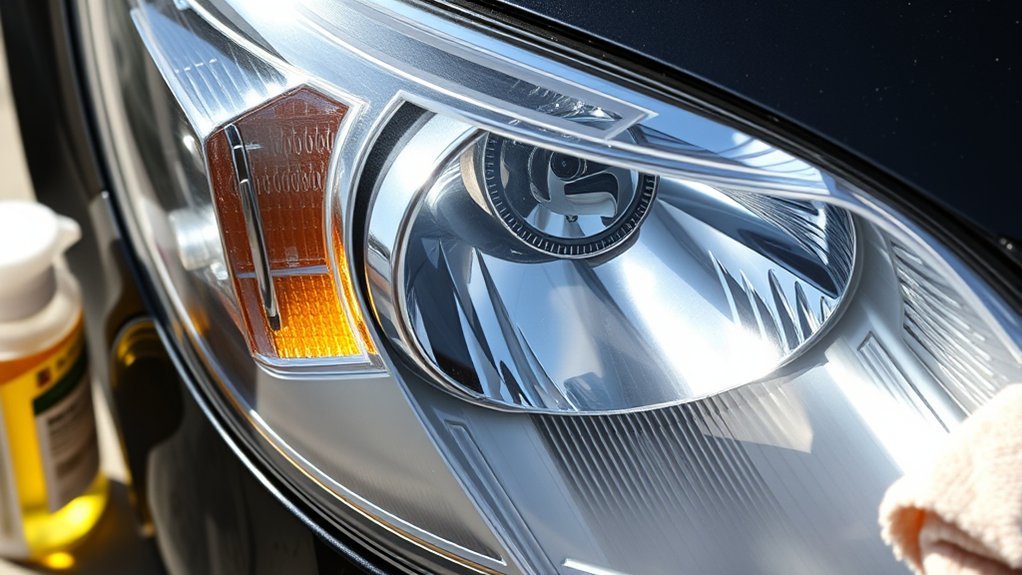
Finally, consider using an optional UV headlight sealant to protect against future fogging and oxidation, ensuring your headlights remain clear and functional for longer.
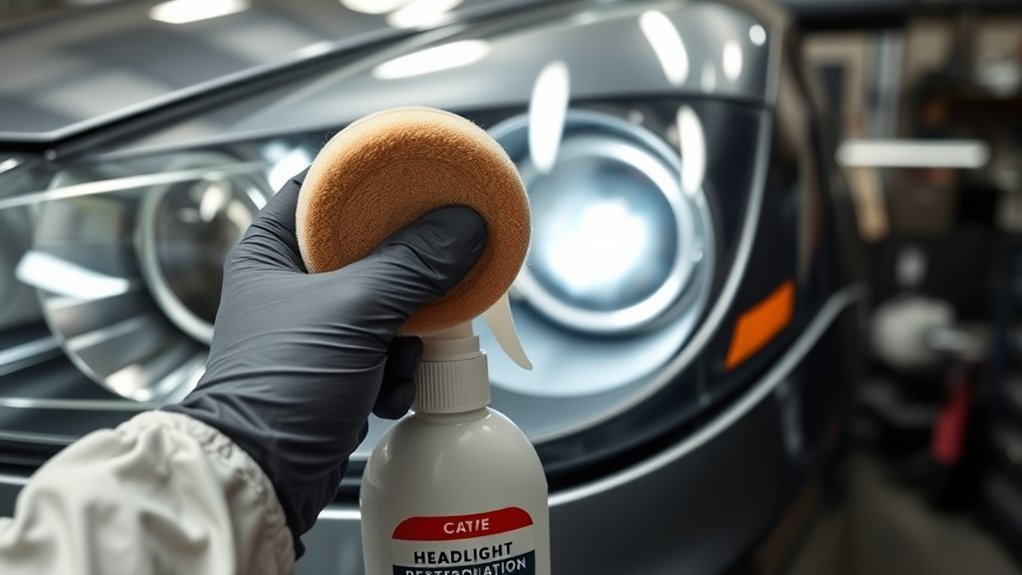
Recommended Restoration Kits
When selecting a headlight restoration kit, you’ll find that many options are designed to deliver professional results at home. Popular choices, like the 3M Ultra Headlight Restoration Kit, typically include sanding discs, polishing compounds, and UV sealants. These kits often come with step-by-step guides, enhancing the effectiveness of your restoration process.
| Kit Name | Key Features | Duration of Effectiveness |
|---|---|---|
| 3M Ultra Headlight Restoration | Sanding discs, polishing compounds, UV sealant | 3-6 months |
| Sylvania Headlight Restoration | Drill attachment, UV protection liquid | 3-4 months |
| Meguiar’s Headlight Correction | all-inclusive kit, clear coat included | 6 months |
| Turtle Wax Headlight Renew | Easy-to-follow instructions, fast results | 3 months |
Always choose restoration kits with UV protection to maintain clarity.
Step-by-Step Guide to Headlight Restoration
To restore your headlights effectively, you’ll need essential materials like baking soda, white vinegar, and sandpaper.
Start by cleaning the headlights thoroughly to guarantee the best results during the restoration process.
Next, employ proven techniques to tackle cloudiness, enhancing both visibility and aesthetics.
Essential Materials Needed
Cleaning cloudy car headlights requires just a handful of essential materials. First, gather baking soda, white vinegar, and non-gel toothpaste, preferably whitening.
You’ll also need microfiber cloths for effective scrubbing and masking tape to protect the surrounding areas.
Start by mixing 2 tablespoons of baking soda with 1 tablespoon of vinegar to form a scrubbing paste. Before diving into restoration, clean the headlights with soap and water to eliminate surface dirt.
For an added boost, apply non-gel toothpaste to a damp cloth and scrub in circular motions for 5-10 minutes to enhance clarity.
Optionally, consider using a UV headlight sealant post-cleaning to guard against future fogging, ensuring your headlights remain clear and effective.
Effective Cleaning Techniques
While ensuring your safety and the integrity of your vehicle, start the headlight restoration process by thoroughly cleaning the headlights with soap and water.
Once clean, protect the surrounding paint with masking tape before proceeding.
For a DIY approach, apply non-gel toothpaste to a damp cloth, scrubbing in circular motions for 5-10 minutes, then rinse and dry.
Alternatively, mix 2 tablespoons of baking soda with 1 tablespoon of white vinegar, apply it to the headlight, scrub, and rinse for enhanced clarity.
If needed, use fine sandpaper (800, 1000, and 2000 grit) for wet sanding, maintaining lubrication and evaluating clarity.
Finally, protect your restored headlights with a UV headlight sealant or clear coat, allowing it to dry completely.
Top Mistakes to Avoid in Headlight Restoration
When restoring cloudy car headlights, avoiding common mistakes is essential for achieving a clear and long-lasting result. Here are key pitfalls to steer clear of:
| Mistake | Consequence |
|---|---|
| Skipping preparation steps | Scratches on paint, ineffective results |
| Using coarse sandpaper first | Deep scratches, difficult to polish |
| Neglecting lubrication | Increased damage during sanding |
| Not applying UV sealant | Quick re-oxidation of headlights |
| Rushing polishing process | Uneven coverage, diminished clarity |
What to Do If Restoration Fails?
Even with careful attention to detail, restoration efforts can sometimes fall short. If your attempts to restore your headlights haven’t worked, first assess the cloudiness. Wet the headlights; if they remain cloudy when wet, the issue could be internal, and replacement may be necessary.
Keep in mind that OEM headlights usually outperform aftermarket options in both performance and longevity.
OEM headlights typically excel over aftermarket alternatives in terms of both durability and effectiveness.
If clarity doesn’t improve after several restoration attempts, it may signal severe damage that warrants professional assessment or outright replacement. While restoration kits often yield temporary results, a DIY wet sanding and clear coating method can provide more durable outcomes.
To maintain headlight clarity and prevent future restoration needs, regularly monitor for haze and apply a UV-resistant sealant every couple of years. This proactive approach can help you effectively restore your headlights and enhance your vehicle’s safety and aesthetics.
Should You Hire a Pro or Replace Your Headlights?
Deciding whether to hire a professional or replace your headlights can be challenging, especially when faced with persistent cloudiness. If the cloudiness stems from internal damage or moisture, replacement is often the only lasting solution, as restoration won’t resolve these issues.
Conversely, if the issue is severe oxidation, investing in professional headlight restoration services can yield better results than DIY methods, addressing the damage more thoroughly.
Examine your headlights; if clarity doesn’t improve when wet, consider replacement. OEM headlights generally outperform aftermarket options, ensuring maximum brightness and longevity.
While restoration kits can provide temporary fixes, they often fall short for long-term clarity. If you choose restoration, complement the process with a high-quality clear coat application for lasting results.
Ultimately, weigh the severity of your headlights’ condition against the cost of restoration versus replacement to make an informed decision.
Frequently Asked Questions
Can Cloudy Headlights Be Restored?
Yes, you can restore cloudy headlights through effective headlight maintenance techniques. Using DIY methods like wet sanding or protective coatings can enhance clarity and prolong the lifespan of your headlights, ensuring ideal visibility and safety.
How Do You Remove Cloudy Film From Headlights?
Over 80% of drivers underestimate headlight maintenance’s importance. To remove cloudy film, clean with soap, apply non-gel toothpaste in circular motions, or use a baking soda-vinegar paste, then rinse thoroughly for clarity.
What Is a Simple Trick to Restore Foggy Headlights?
You can restore foggy headlights by scrubbing non-gel toothpaste in circular motions for 5-10 minutes. For ideal headlight maintenance, clean them regularly to prevent future cloudiness and guarantee safe nighttime driving.
Will Magic Eraser Remove Headlight Haze?
Magic Eraser can remove headlight haze, but its effectiveness varies. While it might improve clarity, it risks scratching the lens. Consider using specialized products for a safer, longer-lasting solution that maintains your headlights’ integrity.
Conclusion
In the grand tapestry of car maintenance, restoring your headlights can be a rewarding venture. By tackling that cloudiness with the right tools and techniques, you’ll not only enhance your vehicle’s appearance but also improve your night vision on the road. If you find the task intimidating or the results unsatisfactory, don’t hesitate to consult a professional. After all, sometimes it’s best to let the experts sprinkle their magic on your headlights for ideal clarity and safety.


Leave a Reply