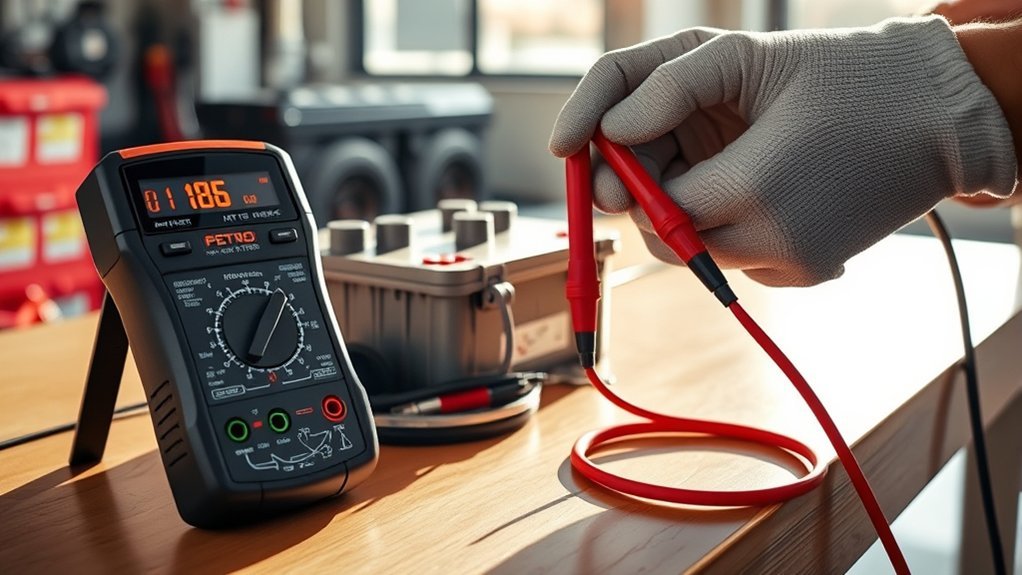
To test your car battery with a multimeter, verify the battery has rested for at least an hour. Set your multimeter to 20V DC and connect the red probe to the positive terminal and the black probe to the negative terminal. A healthy battery should read around 12.6 volts or higher. If you see lower readings, it might indicate discharge or other issues. Continue to explore common battery signs and maintenance tips for peak performance.
Key Takeaways
- Ensure the battery has rested for at least an hour before testing for accurate voltage readings.
- Set the multimeter to 20V DC and connect the probes: red to positive, black to negative.
- A healthy battery should read 12.6 volts or higher; anything below 12.2 volts indicates discharge.
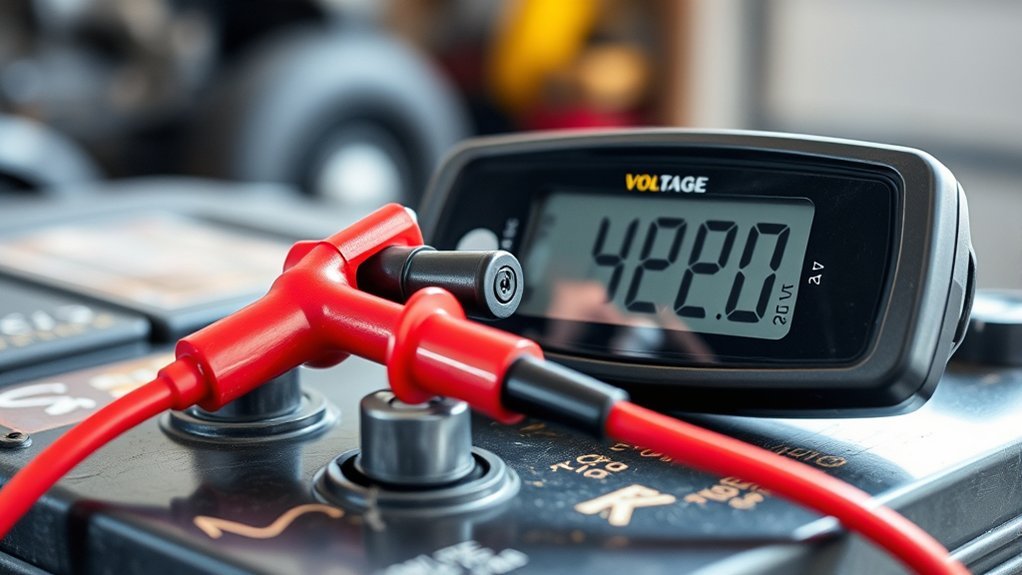
- Check voltage with the engine running; a healthy alternator should show between 13.8V and 14.4V.
- Regularly monitor battery voltage and maintain clean terminals to prevent corrosion and ensure longevity.
Step-By-Step Process to Test Your Car Battery
Testing your car battery is a straightforward process that only requires a few steps to confirm you’re getting an accurate reading.
First, verify your battery has been resting for at least an hour. This helps stabilize the battery voltage for a precise test.
Next, set your multimeter to 20V DC. Connect the red probe to the positive terminal and the black probe to the negative terminal of the battery. This will allow you to measure the voltage accurately.
Set your multimeter to 20V DC, connecting the red probe to the positive terminal and the black probe to the negative terminal for an accurate voltage reading.
A healthy car battery should read approximately 12.6 volts or higher. If your reading falls below 12.2 volts, it indicates that you need to charge or possibly replace the battery.
For best results, perform this test in the morning when the battery hasn’t been recently charged by the alternator.
Essential Safety Precautions for Car Battery Testing
Before testing your car battery, inspect the terminals for corrosion or looseness to guarantee a secure connection.
It’s also vital to turn off all electrical accessories to prevent accidental shorts during the voltage measurement.
Taking these steps will enhance safety and accuracy in your testing process.
Inspect Battery Terminals First
Inspecting the battery terminals is essential for guaranteeing accurate test results and maintaining safety during the process. Start by checking for signs of corrosion, as this can hinder electrical contact and skew your readings.
Make certain the battery terminals are securely fastened; loose connections can lead to inaccurate voltage measurements and create potential hazards. Always wear safety gloves and eye protection while handling the battery to guard against acid spills and explosive gases.
Remember, before measuring the resting voltage, confirm that all electrical accessories in the vehicle are turned off to avoid interference with your multimeter readings.
Keep your hands clear of moving parts and verify the test leads are correctly inserted to prevent accidental shorts during testing.
Turn Off Accessories Before Testing
To guarantee accurate battery voltage readings, turning off all electrical accessories is essential. Before testing, make certain to turn off the headlights, radio, and any other electrical components. This step eliminates any load on the battery, allowing you to assess its true state of charge. A fully charged battery should read around 12.6 volts at rest, but this can be skewed if accessories are still active.
| Action Taken | Effect on Battery | Importance |
|---|---|---|
| Turn off headlights | No load | Guarantees accurate reading |
| Disable radio | No load | Prevents power drain |
| Disconnect other accessories | No load | Validates battery status |
| Wait a moment | Stabilizes voltage | Confirms true charge |
| Measure voltage | Accurate reading | Determines battery health |
Setting Up Your Multimeter for Battery Testing
To set up your multimeter for battery testing, start by selecting the DC voltage setting at 20V.
Connect the red lead to the V/Ω jack and the black lead to the COM port to guarantee proper functionality.
Always double-check that your multimeter is working correctly with a known voltage source before proceeding.
Selecting Proper Voltage Setting
Setting the proper voltage on your multimeter is vital for accurately testing a car battery. Set your multimeter to 20V DC, as this range guarantees precise measurements within the expected voltage levels of a typical car battery.
If you’re using a digital multimeter, consult the manual to confirm the correct settings and connections. Before testing, allow the battery to rest for at least an hour after use to get an accurate resting voltage reading.
Remember to check that your test leads are fully inserted into their respective jacks. Following these steps will help you obtain reliable results while maintaining safety when handling the battery.
Proper voltage setting is essential for effective diagnostics and safeguarding your battery’s health.
Connecting Test Leads Correctly
Connecting the test leads correctly is vital for accurate battery testing. First, confirm your multimeter is in DC voltage (VDC) mode, ideally set to the 20V range for precision.
Next, attach the red lead to the battery’s positive terminal and the black lead to the negative terminal. This configuration prevents short circuits and guarantees you obtain a stable voltage reading.
Make certain the connections are secure and that any accessories are turned off to avoid inaccurate readings from electrical draw.
Once connected, check the display: a healthy battery should show around 12.6V or higher at rest. This straightforward setup is essential for evaluating your battery’s health effectively.
Ensuring Safety Precautions
Before you begin testing your car battery, it’s important to prioritize safety by inspecting the battery terminals for corrosion or looseness. This guarantees secure connections and accurate readings.
Additionally, make certain to turn off all electrical accessories in the vehicle to prevent any interference with your measurements.
Follow these steps for proper multimeter setup:
- Set the multimeter dial to VDC (DC volts) for voltage measurements.
- Insert the red lead into the V/Ω jack and the black lead into the COM jack.
- Utilize the MIN/MAX tracking feature to monitor voltage fluctuations.
- Double-check connections to maintain safety precautions throughout the test.
Interpreting Your Car Battery Voltage Results
How can you accurately assess the health of your car battery? By interpreting your voltage readings, you can gauge the battery’s condition and its role in the electrical system. Here’s a quick reference guide:
| Voltage Reading | Battery Charge Level | Status |
|---|---|---|
| 12.6 volts | Full Charge | Healthy |
| 12.4 – 12.5 volts | Approximately 75% Charged | Monitor Soon |
| 12.2 volts | Approximately 50% Charged | Needs Attention |
| Below 12.0 volts | Discharged or Weak | Charge or Replace |
If your battery test shows a reading between 13.8 and 14.4 volts while the engine runs, it indicates the alternator is charging effectively. Consistently low voltage readings can point to battery issues, so consider further investigation or load testing. Stay proactive for peak performance!
Common Indicators of a Weak or Discharged Car Battery

Recognizing the signs of a weak or discharged car battery is essential for maintaining your vehicle’s performance. If you notice any of the following indicators, it’s time to take action:
Stay vigilant for signs of a weak battery to ensure your vehicle operates efficiently and avoids unexpected issues.
- Dim headlights: If your headlights appear weak or flicker, it suggests the battery isn’t delivering sufficient power.
- Difficulty starting: Slow cranking or clicking sounds when you turn the ignition often point to a weak battery.
- Corrosion: Look for buildup around battery terminals; this can hinder connections and affect power delivery.
- Physical damage: Swelling, bulging, or leaking battery casing indicates a failing battery and should be checked immediately.
A healthy battery should read about 12.6 volts at rest. If it falls below 12.2 volts, you’ve got a discharged battery that needs charging.
Stay alert to these signs to guarantee your vehicle runs smoothly and avoid unexpected failures.
Checking Your Alternator: What You Need to Know
Have you ever wondered if your alternator is functioning correctly? To check, you’ll need to measure the voltage with the engine running. A healthy charging system should read between 13.8V and 14.4V.
If your reading falls below 13.8V, your alternator may be undercharging the battery, which requires further investigation. On the other hand, a voltage above 14.4V indicates overcharging, potentially damaging both the battery and other electrical components.
To take accurate readings, set your multimeter to 20V DC. Connect the red probe to the positive terminal and the black probe to the negative terminal of the battery.
Regularly checking your alternator not only helps prevent battery failures but also guarantees your vehicle’s electrical systems operate smoothly. Remember, maintaining a proper voltage is essential for the longevity of your battery and overall vehicle performance.
When to Get Professional Help for Battery Issues
Understanding your alternator’s performance can help you identify when it’s time to seek professional help for battery issues.
If you’re testing your battery with a multimeter and notice any of the following signs, don’t hesitate to consult an expert:
- Your battery consistently reads below 12.2 volts, indicating it may need to be replaced.
- You experience persistent difficulty starting the engine, even after charging.
- Corrosion on battery terminals or swelling of the battery casing suggests deeper issues.
- Voltage readings while the engine is running fall outside the 13.8V to 14.4V range, hinting at potential alternator problems.
For accurate assessment and load testing, especially with sealed or maintenance-free batteries, it’s essential to seek professional help.
Ignoring these signs can lead to further complications and higher costs down the road.
Make sure your battery is in top shape for a reliable driving experience.
Tips for Maintaining Your Car Battery in Good Condition
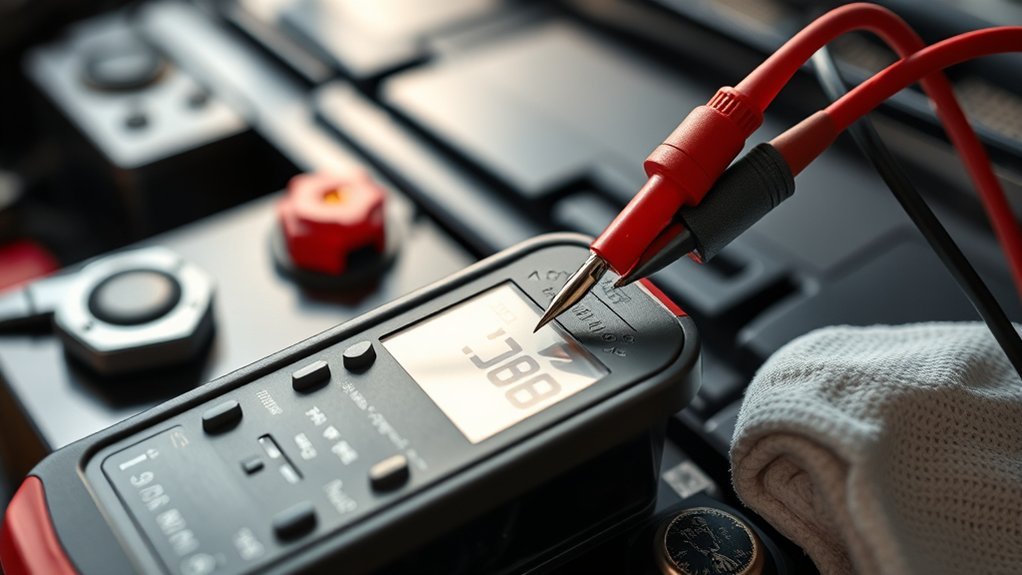
To keep your car battery in good condition, routinely monitoring its voltage is crucial. Regularly check your car battery with a multimeter to confirm it reads 12.6 volts or higher, which indicates a healthy battery.
For accurate assessments, test the battery voltage in the morning after it has rested for at least an hour and make certain all vehicle accessories are turned off. This prevents active electrical draw from skewing your readings.
Additionally, keep the battery terminals clean and free from corrosion to maintain peak electrical connections and prevent voltage drops. If your battery voltage falls below 12.2 volts, charge it fully and retest to avoid unexpected failures and extend its lifespan.
Frequently Asked Questions
How to Test Voltage on a Car Battery With a Multimeter?
To test voltage on a car battery, use a multimeter set to 20V DC. Connect probes to the terminals, and make sure your readings align with battery maintenance tips; aim for at least 12.6 volts for healthy performance.
What Should a 12 Volt Battery Read on a Multimeter Car?
Your 12-volt battery should read around 12.6 volts for ideal health. If it dips below 12.2 volts, consider charging. Use a multimeter wisely; it’s your trusty sidekick for monitoring battery voltage ranges and health indicators.
What Is a Normal Multimeter Reading for a Car Battery?
A normal multimeter reading for a car battery ranges from 12.4 to 12.6 volts. Set your multimeter correctly, and interpret readings carefully to gauge the battery’s health and charging state effectively.
Is 10.5 Volts a Dead Battery?
A battery voltage of 10.5 volts signals a lifeless battery, often struggling with charging issues. This low reading hints at diminished battery lifespan, suggesting it’s time to contemplate a replacement for reliable performance.
Conclusion
In summary, regularly testing your car battery with a multimeter is like tuning a finely crafted instrument; it guarantees peak performance and longevity. By following the steps outlined, you not only safeguard your vehicle’s reliability but also extend the life of your battery. Remember, a well-maintained battery is the heartbeat of your car, ready to propel you forward. If you encounter persistent issues, don’t hesitate to seek professional help—sometimes, even the best need a skilled hand.


Leave a Reply