If your Tesla frunk is stuck, locate the emergency release cable under the front bumper. Push the cover at the 4:00 position to reveal the cable and pull it straight down to open the frunk. If the latch won’t respond due to a dead battery, apply downward pressure while attempting to open it. Check for any actuator issues as well. If problems persist, you’ll find valuable insights on troubleshooting further challenges ahead.
Key Takeaways
- Locate the emergency release cable under the front bumper, usually behind a small cover on the left side.
- Pull the emergency release cable straight down to unlock the frunk.
- If the actuator is malfunctioning, apply downward pressure on the hood while pressing the release button.
- Use a 9V battery to power the actuator directly if the 12V battery is dead.
- Regularly check and maintain the frunk components to prevent future issues.
How to Access Your Stuck Tesla Frunk: A Step-by-Step Guide
If your Tesla frunk is stuck, don’t panic; you can access it with a few straightforward steps. First, locate the emergency release cable, typically under the front bumper at the center. Pull this cable to open the frunk.
If your Tesla frunk is stuck, locate the emergency release cable under the front bumper and pull it to open.
If the cable’s blocked, use specialized lift pucks to safely elevate the vehicle for access.
If your vehicle’s 12V battery is dead, you can employ a 9V battery to activate the frunk actuator. While attempting to open the frunk, apply downward pressure on the hood to relieve latch tension, making it easier for the actuator to pop open.
For ongoing frunk maintenance, regularly check that the release mechanisms function smoothly.
If these opening techniques don’t work, or if you’re unsure, reach out to Tesla service for professional assistance. They possess specialized tools to access the frunk without causing damage, ensuring your vehicle remains intact.
Top Causes for a Stuck Tesla Frunk: Understanding the Issues
If your Tesla frunk is stuck, it’s essential to identify the underlying issues.
A malfunctioning actuator can prevent the latch from releasing, while a dead 12V battery can render the frunk unresponsive.
Recognizing these symptoms early can save you time and frustration in getting it open.
Actuator Malfunction Symptoms
When you encounter a stuck Tesla frunk, recognizing the symptoms of an actuator malfunction can help identify the root of the issue. A common sign is the inability to open the frunk despite hearing the latch engage, suggesting the latch mechanism isn’t fully releasing.
If the frunk doesn’t pop up at all, it may indicate a failed actuator or internal breakage. An audible clicking sound during attempts to open it points to the actuator receiving power but malfunctioning. Water ingress can damage actuators, leading to these issues.
Additionally, if modifications or service work have been done, incorrect parts or misalignments may hinder operation. Regular frunk maintenance tips and actuator testing methods can help prevent these problems.
Dead 12V Battery Issues
A dead 12V battery often leads to a stuck Tesla frunk, as it’s vital for powering the latch mechanism.
You might notice symptoms like a non-responsive frunk button or dashboard alerts indicating “service required.” Cold weather can worsen battery performance, making winter preparedness important.
To avoid unexpected issues, prioritize regular battery maintenance, including checks and timely replacements.
If you suspect your 12V battery is dead, don’t panic. You can use a 9V battery to temporarily power the frunk actuator, allowing you to manually open it.
This method can provide the liberation you need in a frustrating situation, ensuring you can access your frunk even when your vehicle’s battery isn’t cooperating.
Stay proactive to prevent these frustrating scenarios.
How to Use the Emergency Release Cable to Open Your Frunk
To open your Tesla frunk using the emergency release cable, first locate the cable behind the cover on the left side of the front bumper.
Carefully pull the cable, which is positioned near the center underneath the vehicle.
Remember to take safety precautions, like ensuring the vehicle is stable and using proper tools, to avoid any damage.
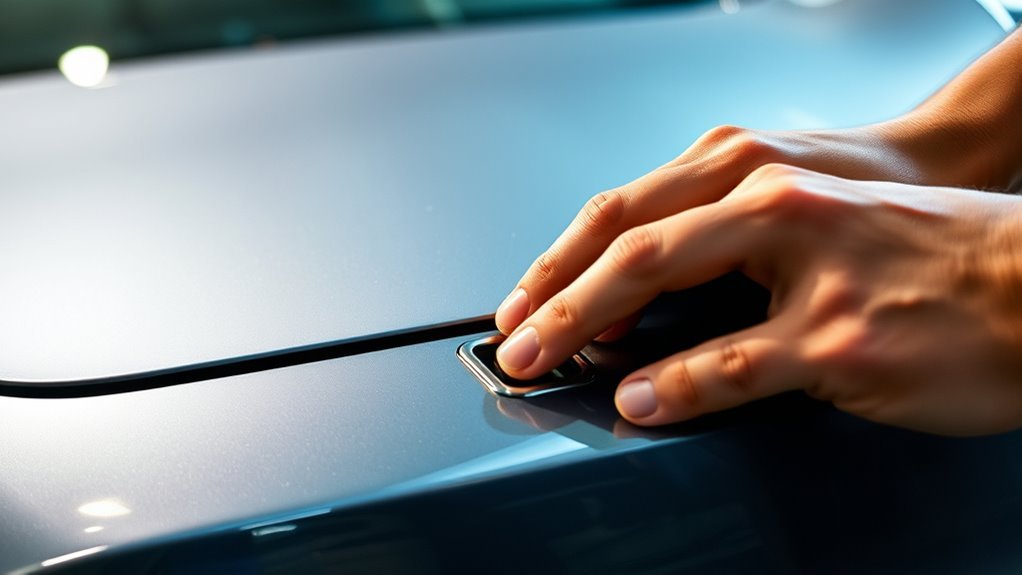
Locate Emergency Release Cable
In some situations, you may need to access the emergency release cable to open your Tesla frunk manually. The emergency cable is typically located beneath the front bumper, requiring you to carefully position yourself under the vehicle.
Start by locating the 2-inch cover on the left side of the front bumper; push it in at about the 4:00 position to reveal the cable. This action allows you to access the mechanism that disengages the frunk latch.
If needed, use Tesla’s specialized lift pucks to elevate the vehicle safely, ensuring proper clearance for your task. Avoid attempting this process without the right tools and knowledge, as improper handling can lead to damage or complications.
Pulling the Release Cable
Once you’ve accessed the emergency release cable beneath the front bumper, grasp it firmly and pull it straight down. This action should open the frunk, allowing you to open it even if the electronic latch has failed.
Here are some frunk access tips to guarantee smooth operation:
- Make sure the vehicle is safely lifted to avoid damaging the battery pack.
- Locate the release cable location, typically behind a cover on the left side.
- If you encounter resistance, double-check your grip and angle.
- Should the cable not work, don’t hesitate to contact Tesla service or roadside assistance for help.
Safety Precautions to Consider
Using the emergency release cable to open your frunk requires careful attention to safety precautions.
First, guarantee your vehicle is safely elevated with specialized lift pucks to protect the battery pack and other components.
The emergency release cable is hidden behind a 2-inch cover on the left side of the front bumper; gently push at the 4:00 position to access it.
Pulling the manual release cable should open the frunk, but you may need the right tools for effective reach, especially if the vehicle is unresponsive.
If the frunk remains closed, push down on the hood to relieve latch pressure.
Always consider frunk security risks when using manual access, as it may permit unauthorized entry if left unattended.
Troubleshooting Your Tesla Frunk Actuator Issues
When your Tesla frunk actuator fails to respond, troubleshooting becomes essential to restore access. Here are some effective frunk actuator troubleshooting steps you can take:
- Use a 9V alkaline battery to supply power directly to the actuator wires, potentially activating the mechanism.
- Inspect the frunk latch for signs of internal breakage, as common issues involve the actuators not fully engaging the release cables.
- If all else fails, reach under the vehicle to pull the emergency release cable, typically located behind a cover on the left side of the front bumper.
- Try pushing down on the frunk while pressing the release button; this can relieve pressure on the latch and help if the actuator is partially functional.
Tips to Prevent Future Frunk Problems
To prevent future frunk problems, it’s crucial to regularly maintain your Tesla’s 12V battery, as a dead battery can cause accessibility issues. Implement these frunk maintenance tips to guarantee smooth operation.
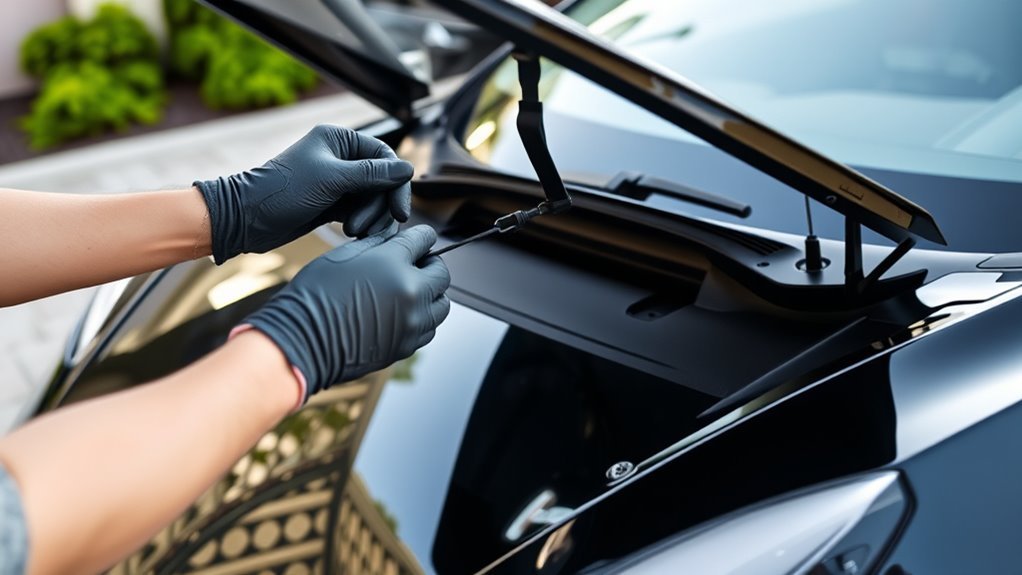
First, inspect the battery frequently and recharge it as needed. Next, apply lubricant to the frunk actuators and hinges to prevent mechanical binding. This will help keep the frunk functioning reliably.
Regularly check and recharge your battery, and lubricate frunk actuators and hinges for reliable operation.
Avoid overloading the frunk with heavy items; doing so can strain the latch mechanism and lead to malfunctions. Additionally, keep the frunk area dry and free from moisture, as water ingress can damage electronic components and actuators.
For added peace of mind, consider installing a manual frunk release cable as an aftermarket modification. This allows for easier access during electronic failures, enhancing your overall experience with your Tesla while guaranteeing your freedom to use your vehicle without hassle.
When to Call a Professional for Stuck Frunk Issues?
Even with regular maintenance and precautions, there may be times when your frunk becomes stuck, leading to frustration.
Knowing when to seek professional assistance is vital for resolving frunk issues efficiently. Here are some scenarios where you should call for help:
- You’ve tried multiple times to open the frunk manually, including pushing down on the hood while pressing the button, but it still won’t budge.
- You suspect the 12V battery is dead, leaving the vehicle unresponsive and requiring specialized tools to access the frunk.
- You can’t safely locate or access the emergency release cable, risking damage to your vehicle.
- The frunk actuator makes unusual noises or shows clear signs of malfunction, needing a mechanic’s expertise.
In these cases, engaging Tesla roadside assistance or contacting a professional guarantees that your frunk issues are resolved safely and effectively.
Conclusion: Ensuring Easy Access to Your Frunk
While maintaining easy access to your frunk might seem straightforward, it requires regular checks and familiarity with its components.
Start with frunk maintenance tips: routinely inspect the actuator and 12V battery to prevent unexpected locking issues. Knowing the emergency release cable’s location, typically behind a cover on the left side of the front bumper, is essential for quick access.
Keep a 9V alkaline battery on hand; it can activate the frunk actuator if the 12V battery fails. For added security, consider adding a manual release cable as a modification. This simple step enhances your emergency preparedness, guaranteeing you can always access your frunk when needed.
Finally, engage with Tesla owner forums to exchange experiences and gather insights on maintaining frunk accessibility.
Frequently Asked Questions
How to Manually Open a Tesla Frunk?
To manually open your Tesla frunk, locate the emergency release cable behind the cover. For frunk maintenance tips, make certain the latch operates smoothly. If stuck, follow emergency frunk access steps or seek professional assistance.
How to Open a Tesla Hood Without Power?
In emergency situations, 50% of Tesla owners may face power loss. To open a Tesla hood without power, locate the emergency release cable under the bumper or temporarily power the actuator with a 9V battery.
How to Fix a Tesla Frunk Not Opening?
To fix your Tesla frunk not opening, try frunk troubleshooting tips like applying upward pressure while pressing the button. Check for frunk latch issues or consider accessing the emergency release cable under the bumper if necessary.
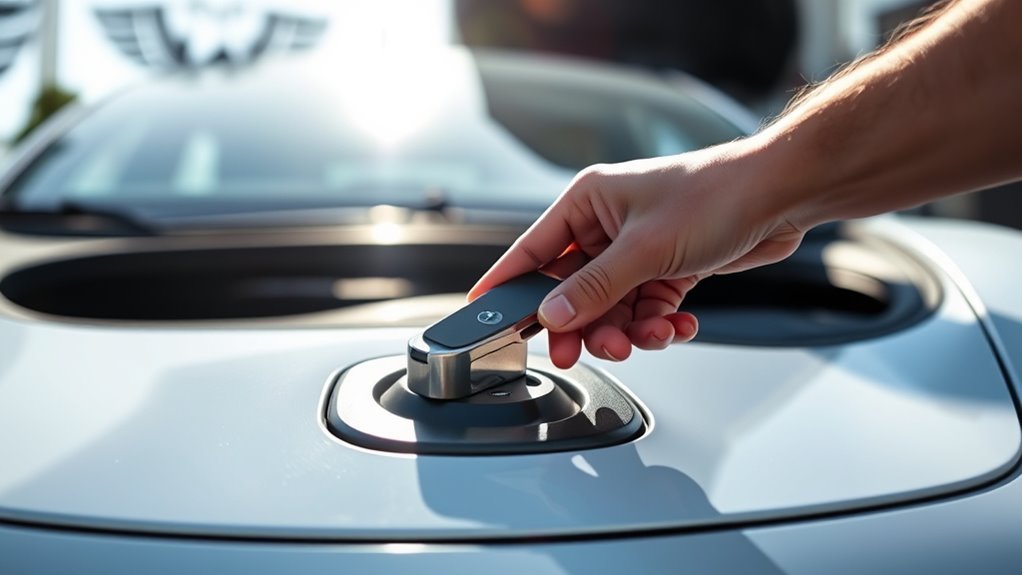
Is There a Way to Manually Open a Tesla Glovebox?
Opening a Tesla glovebox is like unfastening a treasure chest. Locate the glovebox release button, or use the touchscreen for manual access. If unresponsive, check the 12V battery—it’s essential for functionality.
Conclusion
To summarize, knowing how to manually open your Tesla frunk can save you time and frustration. Notably, about 3% of Tesla owners report issues with their frunk, highlighting the importance of understanding potential problems. By following the steps outlined in this guide and keeping an eye on your frunk’s functionality, you can guarantee easy access in the future. If you encounter persistent issues, don’t hesitate to call a professional for assistance.


Leave a Reply